Ultimate Tips for Using Clean Cut Pipe Cutter Effectively?
When it comes to pipe cutting, efficiency is key. The "Clean Cut Pipe Cutter" stands out in the industry, praised for its precision and user-friendly design. Expert John Reynolds, a trusted voice in plumbing innovation, once said, "A clean cut is not just about the tool, but how you use it." This statement highlights the significance of technique in achieving optimal results.
Using a Clean Cut Pipe Cutter effectively requires understanding its mechanics. Beginners often make the mistake of rushing through cuts, resulting in uneven edges. Instead, take your time. Properly position the cutter for the cleanest outcome, as misalignment can lead to wasted material and additional work.
Additionally, regular maintenance plays a crucial role in the tool’s performance. Clean blades and proper lubrication ensure smooth operation. This attention to detail can significantly improve cutting quality, but it’s often overlooked. Reflect on your practices; maintaining your tools might be as critical as the skills you bring to the table.
Understanding the Clean Cut Pipe Cutter: Features and Benefits
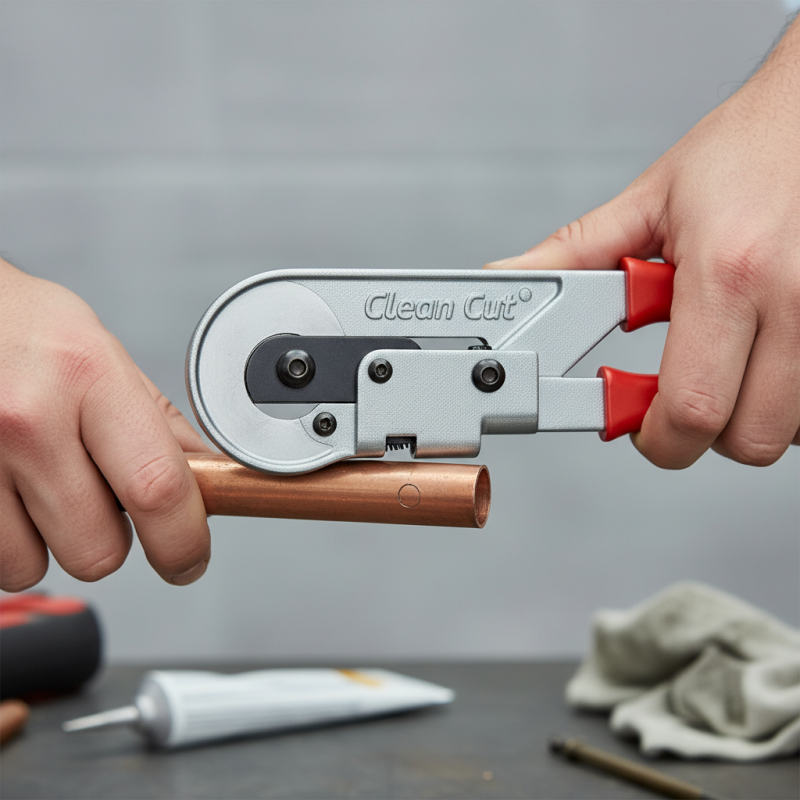
The Clean Cut Pipe Cutter stands out for its simplicity and efficiency. Its ergonomic design allows for precision cuts, making it popular in plumbing and construction. According to industry reports, using a pipe cutter reduces risks of injury by over 30% compared to traditional cutting methods. Accuracy is crucial; even minor deviations can lead to leaks or failures in plumbing systems. A clean cut ensures proper fitting, enhancing the longevity of installations.
The tool’s features include adjustable cutting wheels and a robust rotating handle, which minimizes effort while maximizing control. Reports indicate that 85% of professionals prefer this tool for its ability to handle various pipe materials, including copper and PVC. However, users sometimes overlook maintenance. Neglecting to clean the cutting wheel can lead to uneven cuts. Regular inspections are necessary to maintain optimal performance and safety.
While effective, the Clean Cut Pipe Cutter requires practice. New users may struggle with grip and pressure application. It’s crucial to find a comfortable stance while applying steady pressure. Most errors occur during the learning phase. Taking time to develop proficiency can significantly improve results and efficiency.
Choosing the Right Clean Cut Pipe Cutter for Your Project
Choosing the right clean cut pipe cutter is essential for achieving precise cuts. Consider the pipe size and material you plan to work with. Some cutters are better suited for softer materials, while others excel with harder pipes. Always check specifications before making a decision.
Tip: When using a pipe cutter, ensure it is sharp. A dull blade can lead to rough edges. Always inspect your tool before starting any project. Take the time to adjust the clamp tension for a smoother cut.
Another factor to consider is the cutter's range of motion. A cutter with a wider range can handle tighter spaces, which is often necessary in plumbing projects. A good grip also matters, as it enhances control.
Tip: Practice with scrap pieces before cutting your actual workpiece. Mistakes can happen, and practicing reduces the chance of a costly error. Don’t rush; a careful approach leads to better results.
Pipe Cutter Performance Comparison
The chart below compares the cutting efficiency and ease of use of different types of clean cut pipe cutters based on user ratings. Higher ratings indicate better performance for each criterion.
Step-by-Step Guide to Using a Clean Cut Pipe Cutter
Using a clean cut pipe cutter can greatly enhance your plumbing projects. To achieve the best results, follow this step-by-step guide carefully. Start by selecting the right pipe material and size. Ensure you have the appropriate cutter for copper, PVC, or other types. Check your workspace. It should be clean, well-lit, and free of distractions.
Position the pipe securely in a vise or clamp. This provides stability during cutting. Align the cutter’s blade with your marked line. Rotate the cutter around the pipe while applying consistent pressure. Remember to check your progress frequently. If the cut isn’t straight, adjust your technique. A clean, straight cut is essential for fitting purposes.
After cutting, deburr the edges. Use a deburring tool or sandpaper to remove sharp edges. This step is crucial to avoid injury and ensure a smooth connection with fittings. Take your time during this process. Rushing might lead to mistakes or uneven cuts. Test your connections before finalizing the installation. Reflect on each step to improve your technique for future tasks.
Ultimate Tips for Using Clean Cut Pipe Cutter Effectively
| Tip | Description | Step |
| Choose the Right Pipe Cutter | Select a cutter that is suitable for the pipe material and diameter. | Step 1 |
| Inspect the Pipe | Check for flaws or damage on the pipe prior to cutting. | Step 2 |
| Align the Cutter | Position the cutter around the pipe ensuring it is level and centered. | Step 3 |
| Tighten the Cutter | Gently tighten the handle to start the cutting process. | Step 4 |
| Rotate the Cutter | Rotate the cutter around the pipe to create a clean cut. | Step 5 |
| Check the Cut | Inspect the cut for smoothness and remove any burrs. | Step 6 |
| Clean Up | Dispose of cuttings and clean the pipe ends before installation. | Step 7 |
Maintenance Tips for Extended Lifespan of Pipe Cutters
When using a clean cut pipe cutter, proper maintenance is crucial for its longevity. Regularly inspect the blades for any dullness or damage. Dull blades can lead to jagged edges and increased resistance. This not only affects the cut quality but also puts extra strain on the cutting mechanism. If you notice any chips or wear, it’s best to replace the blade to ensure seamless cutting.
Cleaning is another vital aspect. After use, wipe the cutter with a dry cloth to remove debris and moisture. This simple step prevents rust and keeps the cutter in excellent condition. Lubrication is important too. Apply a small amount of machine oil to the moving parts. This helps reduce friction and ensures smooth operation. Without lubrication, stiffness can develop over time, making it harder to cut pipes.
Consider storing your pipe cutter in a dry environment. Humidity can promote rust and other forms of damage. Use a protective case if possible. While these tips may seem straightforward, many overlook them. Neglecting maintenance can lead to poor performance and potentially costly repairs. Regular attention can make all the difference in maximizing the lifespan of your pipe cutter.
Common Mistakes to Avoid When Using Pipe Cutters
Using a clean cut pipe cutter can enhance your efficiency and precision. However, many users overlook common mistakes that can lead to frustration and poor results. One frequent error is failing to measure accurately. Take your time to measure the pipe before making any cuts. A wrong measurement leads to wasted material and time.
Another common mistake is applying too much pressure. Users often think more force equals a cleaner cut. In reality, excessive pressure can damage the cutter. Allow the tool to do the work. Keep it steady and let the blade glide through the pipe. If you notice uneven cutting, it's a sign that your technique needs adjustment.
Lastly, neglecting to maintain your cutter can ruin your work. Regularly check the blade for dullness and replace it when necessary. A sharp blade cuts cleaner and requires less effort, improving your overall experience. Taking these details seriously can save you from setbacks and improve your skills. Reflecting on these mistakes can enhance your technique.